Raspberry Pi Cluster and Apache Spark!

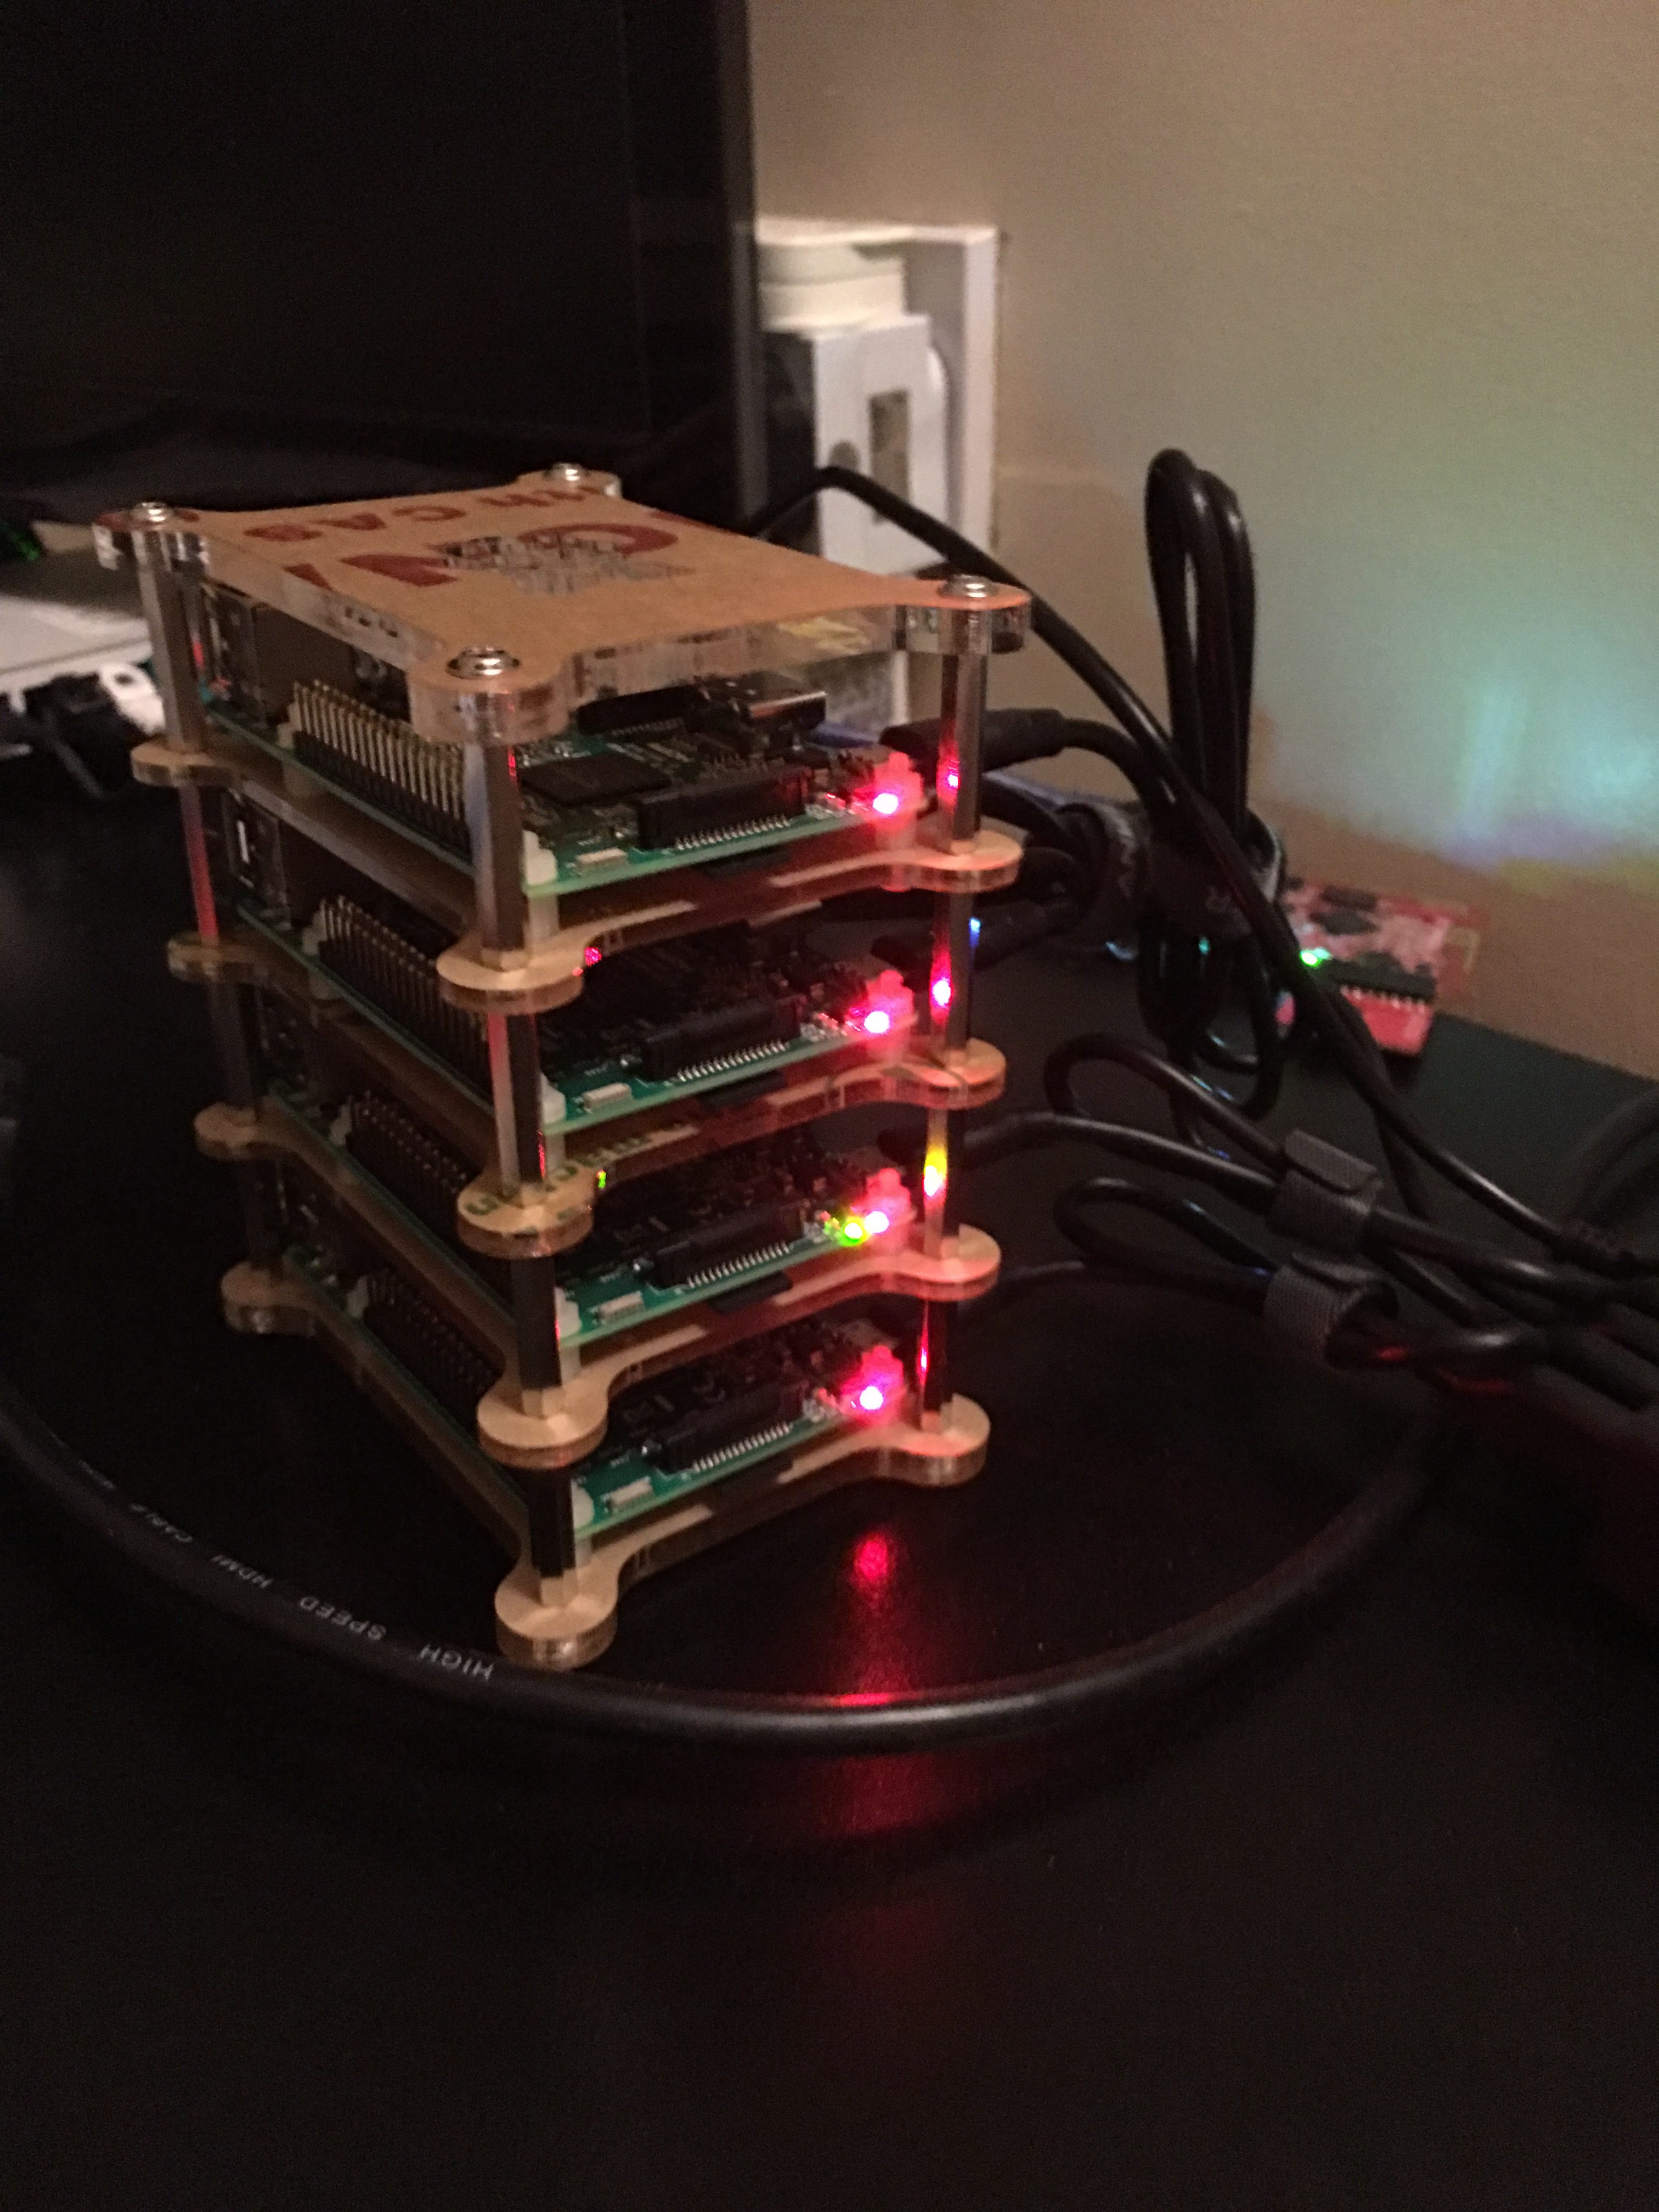
So over the Christmas holidays I have been busy playing with my 4 x Raspberry Pi 3 (Model B) units which I have assembled into a stack. They each have a 16 GB Memory Card with Raspbian.

Spark Pi Cluster
Spark Pi Cluster

The Spark Master is running on a NUC (the Spark driver program runs there or I simply use the ‘spark-shell’).

If you want to make your own cluster here is what you will need:

  • Raspberry Pi 3 Model B (I bought 4 of them – just the Pi’s – don’t bother with the ‘Kit’ because you won’t need the individual cases or power supplies).
  • Rapbian on a Memory Card (16GB will work fine) for each Pi.
  • A stacking plate set (one per Raspberry Pi to mount it) and one pair of ‘end plates’. This acts as a ‘rack’ for your Pi cluster. It also makes sure your Pi boards get enough ventilation and you can place the whole set neatly in a corner instead of having them lying around on the dining table!
  • Multi-device USB power supply (I would suggest Anker 60W PowerPort with 6 USB ports – which can support up to 6 Pi 3’s) so that you end up with one power plug instead of one plug per Pi.
  • To connect the Pi boards to the Internet (and to each other – for the Spark cluster) you will need a multi-port Gigabit switch – I would suggest buying one with at least 8 ports as you will need 1 port per Pi and 1 port to connect to your existing network.
  • A wireless keyboard-trackpad to setup each Pi (just once per Pi).
  • A single HDMI cable to connect with a TV/Monitor (just once per Pi).

Setting up the Pi boards:

Once you have assembled the rack and mounted the boards, install the memory cards on all the boards and connect them to the power supply and the network. Wait for the Pi boards to boot up.

Then one Pi at a time:

  • Connect a keyboard, mouse and monitor – ensure the Pi is working properly then:
    • Set hostname
    • Disable Wireless LAN (as you have Ethernet connectivity- which is more stable)
    • Check SSH works – this will make sure you can remotely work on the Pi
Raspberry Pi Cluster Image

Once all that is done and you can SSH into the Pi boards – time to install Spark:

Again one Pi at a time:

  • SSH into the Pi and use curl -o <spark download url> to download Spark tar.gz
  • tar -xvf <spark tar.gz file> to unzip the tar.gz to a standard location (I use ‘/spark/’ on all the Pi boards)
  • Make sure correct permissions are assigned to the spark folder
  • Add the master machine hostname to the /etc/hosts file
  • Edit your ~/.bashrc and add the following: export SPARK_HOME = <the standard location for your spark>

Similarly install Spark on a node which you will use as the ‘spark cluster master’ – use the same standard location.

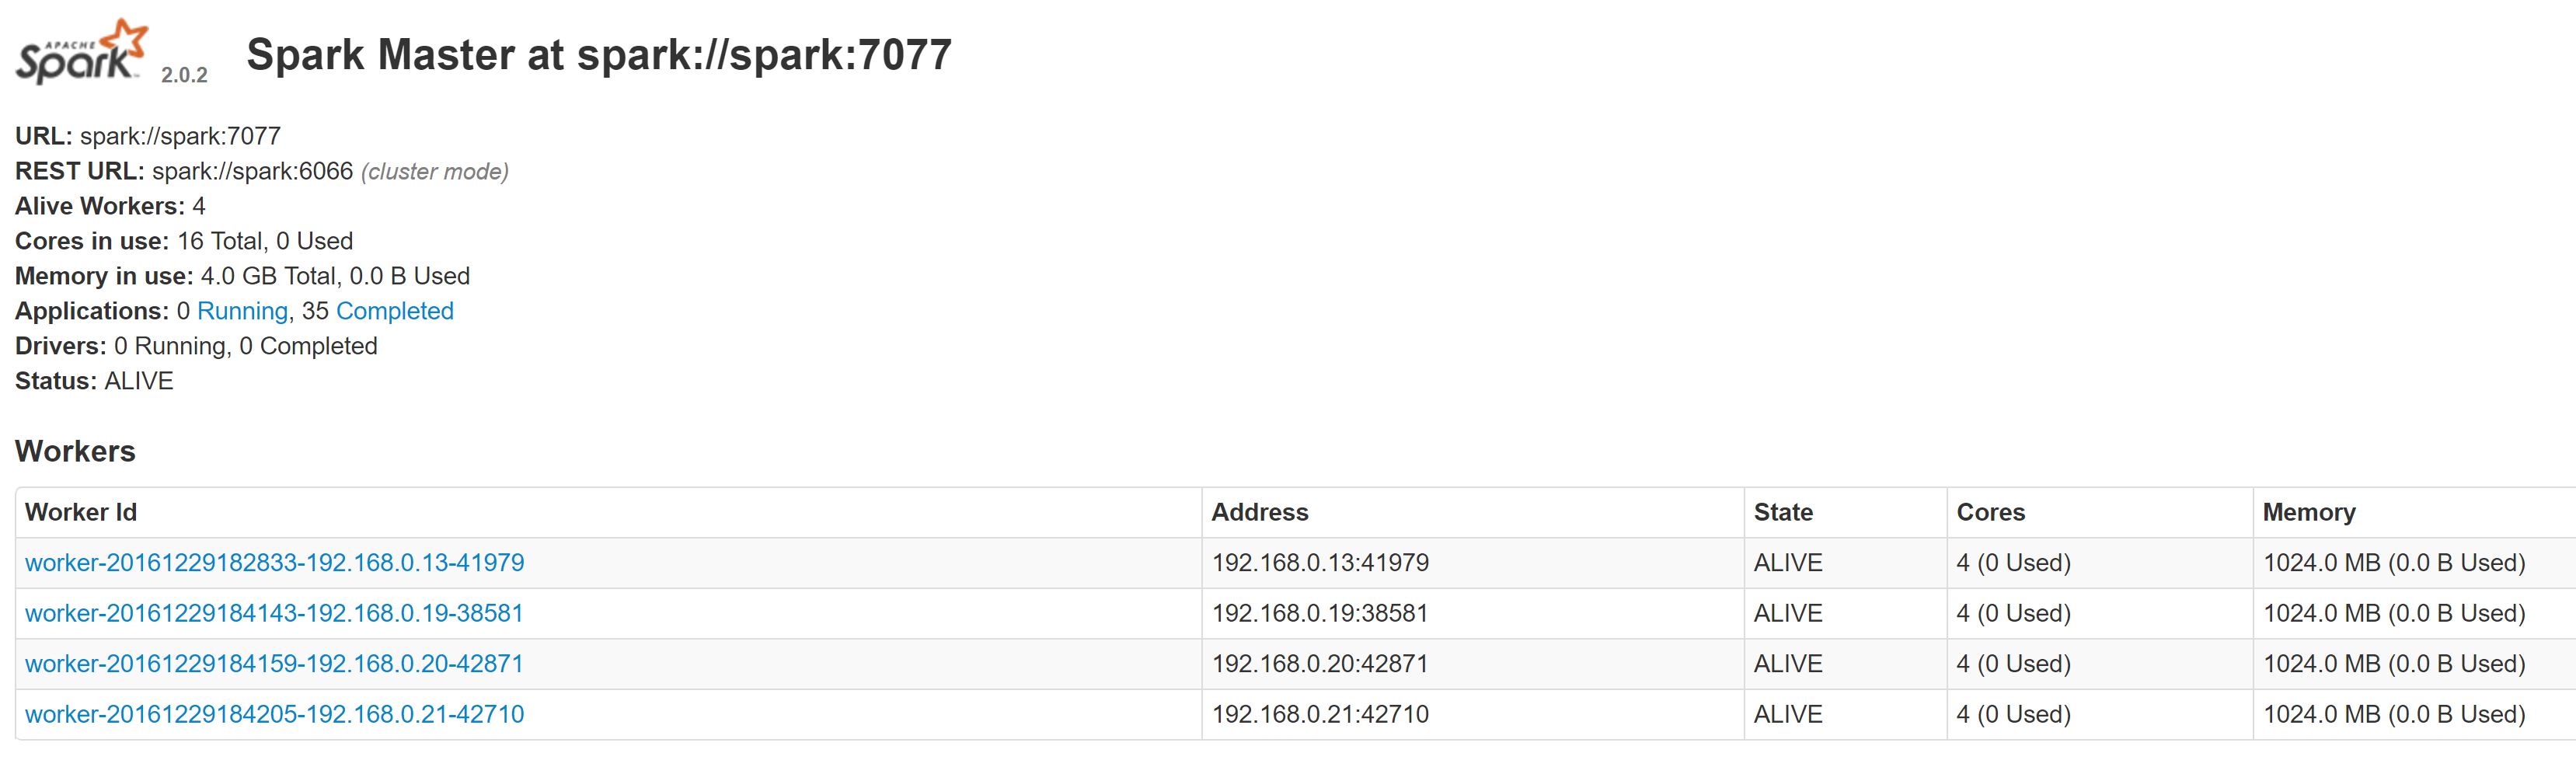
Start up master using the spark ‘start-master.sh’ script. If you go to http://<IP of the Master Node>:8080/ you should see the Spark webpage with the status of the Workers (empty to start with) and various other bits of useful information such as the spark master URL (which we will need for the next step), number of available CPUs and application information. The last item – application information – is particularly useful to track running applications.

SSH into each of the Pi boards and execute the following: ‘start-slave.sh spark://<IP of the Master Node>:7077’ to convert each Pi board into a Spark slave.

Now if you look at the Spark webpage you will see each of the Slave nodes up (give it a couple of minutes) and you will also see the cluster resources available to you. If you have 4 Pi boards as slaves you will see 4 * 4 = 16 Cores and 4 * 1 GB = 4 GB Memory available.

Running Spark applications:

There are two main things to remember when running a Spark application:

  1. All the code that you are running should be available to ALL the nodes in your cluster (including the master)
  2. All the data that you are using should be available to ALL the nodes in your cluster (including the master).

For the code – you can easily package it up in the appropriate format (language dependent – I used Java so I used Maven to build a JAR with dependencies) and network share a folder. This reference can be used when using the spark-submit command (as the location of the application package).

For the data – you have two options – either use a network share as for the code or copy the data to the SAME location on ALL the nodes (including the master). So for example if on the master you create a local copy of the data at ‘/spark/data’ then you must use the SAME location on all the Pi boards! A local copy is definitely required if you are dealing with large data files.

Some tests:

For my test I used a 4 GB data file (text-csv) and a simple Spark program (using ‘spark-shell’) to load the text file and do a line count.

1: Pi Cluster (4 x Raspberry Pi 3 Model B)

  • Pi with Network shared data file: > 6 minutes (not good at all – this is just a simple line count!)
  • Pi with local copies of the data file: ~ 51 seconds (massive difference by making the data local to the node)

2: Spark standalone running on my laptop (i7 6th Gen., 5600 RPM HDD, SATA3 SSD, 16 GB RAM)

  • Local data file on HDD: > 1 min 30 seconds (worse than a Pi cluster with locally copied data file)
  • Local data file on SSD: ~ 20 seconds (massive difference due to the raw speed of the SSD!)

Conclusion (Breaking the Cluster):

I did manage to kill the cluster! I setup a more complicated data pipeline which does grouping and calculations using the 4 GB data file. It runs within 5 mins on my laptop (Spark local). The cluster collapsed after processing about 50%. I am not sure if the issue was related to the network (as a bottleneck) or just the Pi not able to take the load. The total file size is greater than the total available memory in the cluster (some RAM is required for the local OS as well).

So my Spark cluster is not going to break any records, in fact I would be better off using a Spark standalone on my laptop  if it is a one-shot (i.e. process large data file and store the results somewhere).

Things get interesting if we had to do this once every few hours and we could automate the ‘local data copy’ step – which should be fairly easy to do. The other option is to create a fast network share (e.g. using SSDs).

What next:

Some nice project which would suit the capabilities of a Pi cluster? Periodic data processing/stream processing task? Node.JS Servers? Please comment and let me know!

Pokemon Go! Evolve vs Transfer

Each type of Pokemon needs certain number of candies (of a compatible type) to evolve to the next level. Usually you need  either 12, 25, 50, 100 or 400 (Magikarp) to evolve to the next level.

The exact number depends on the Type of the Pokemon as well as its current evolution level. For example Pidgey to Pidgeotto requires 12 Pidgey candies where as Pidgeotto to Pidgeot requies 50.

When looking to evolve Pokemon we often need to ‘transfer’ a few back to the Professor to earn candies before we have enough for the evolution. This is especially true in two cases:

a) Uncommon types (dependent on location etc.): where you will end up having far larger number of that type than you will be able to utilize for evolving. For example in our area there are very few Machop, and for the first level you need 25 Machop candies. Thus I will need to catch 9 Machop before I can evolve Machop! But if I was to transfer I could evolve after catching 7 (giving me 7*3 = 21 Machop candies) and then transferring 4 (giving me 4 Machop candies).

b) Very common types (to maximise evolutions especially if you have a lucky egg activated): where if you have a few hundred Pidgeys (again far few that you can evolve).

In both cases you need a way to calculate, given the current number of a particular type (e.g. for a Pidgey and Pidgeotto are different types even though they are part of the same evolution chain), the number of candies available and the number of candies per evolve – how many extra evolutions you can have by transferring some Pokemon.

The formula is:

ToInteger[(Nt + C) / (1 + Co)] – Nc = Ne

Nt = Number of currently present Type

C = Number of currently available Candies

Co = Number of Candies required for next Evolve

Nc = Number of possible Evolves without Transferring

Ne = Number of extra evolutions possible by transferring Pokemon

For example:

Let us assume you have 103 (C) Eevee candies. Now each evolution of Eevee (which has only a single level) requires 25 (Co) Eevee candies. Let us assume we have 30 (Nt) Eevee with us.

This gives:

Nc = ToInteger(103/25) = 4

ToInteger[(Nt + C) / (1 + Co)] = ToInteger[5.11] = 5, thus Ne = 5 – 4 then Ne = 1

Which means we can return Eevees to get one additional evolve!


Now we need to find out exactly how many Eevees we need to return to achieve that one additional evolve – while making optimal use of existing Eevee candies. The so called Equilibrium condition is that we have no un-evolved Eevees or unused Eevee candies after the evolutions.

The formula for Number of Returns (Nr):

Nr = [(Ne + Nc)*Co] – C

From the example above we have: Ne = 1, Nc = 4, Co = 25 and C = 103, which gives:

Nr = [(1+4)*25] – 103 = 125 – 103 = 22

Thus to make optimal use of existing Eevee and Eevee candies we should transfer 22 out of 30 Eevees and utilize the candies gained from transfer to evolve the remaining Eevees.

The result is not at Equilibrium because we will be left with 3 Eevees after we return 22 and evolve 5 [30 – (22+5) = 3].

Enjoy!

Make Your Own IoT Twitter Bot

Internet of Things (IoT) is one of the big buzzwords making the rounds these days.

The basic concept is to have lightweight computing platforms integrated with everyday devices turning them into ‘smart’ devices. For example take your good old electricity meter embed a computing platform on it and connect it to the Internet – you get a Smart Meter!

Basic ingredients of an IoT ‘device’ include:

  • A data source, usually a sensor (e.g. temperature sensor, electricity meter, camera)
  • A lightweight computing platform with:
    • low power requirements
    • network connectivity (wireless and/or wired)
    • OS to run apps
  • Power connection
  • Data connection (mobile data, ethernet or WiFi)

In this post I wanted to build a basic IoT sensor using an off-the-shelf computing platform to show how easy it is!

This is also to encourage people to do their own IoT projects!

Raspberry Pi and Tessel2 platforms are two obvious choices for the computing platform.

I decided to use Tessel2 which is lot less powerful than Pi (sort of like comparing a Ford Focus with a Ferrari F40).

Tessel2 has a 580MHz processor, 64MB RAM and 32MB flash (just for comparison Pi3B has a Quad Core 1.2GHz processor, 1GB RAM) – both have Wifi and Ethernet built in.

Pi comes with a Debian based OS with full desktop-class capabilities (GUI, Applications etc.) where as Tessel2 just supports Node.JS based apps (it is running Open WRT) and has no GUI capabilities. Therefore it is lot closer to a IoT platform in terms of capabilities, power requirements and form factor.

Temperature Tweeter Architecture

Architecture

Computing Platform: Tessel2

Tessel2 has a set of basic hardware features which includes USB2.0 ports, sensor sockets (where you can plug in different modules such as temperature, GPS, bluetooth) and one Ethernet socket.

Since there is no UI for the Tessel2 OS you have to install the ‘t2’ command line tool to interact with your tessel.

The Tessel2 website has an excellent ‘first steps’ section here.

If you are blessed with a Windows 10 based system you might have some issues with detecting the Tessel2. One solution is to install ‘generic USB drivers’ here. But Google is your friend in case you run into the dreaded: ‘Detected a Tessel that is booting’ message.

Data Source: Climate Sensor Module

The sensor module we use as a data source for this example is the climate sensor which gives the ambient temperature and the relative humidity. The sensor module can be purchased separately and you can connect up to two modules at a time.

Power and Data:

As the sensor is based indoors we use a standard micro-USB power supply. For external use we can use a power bank. The data connection is provided through a wired connection (Ethernet) – again as we are indoors.

The Node.JS Application

Start by creating a folder for your Tessel2 app and initialise the project by using the ‘t2 init’ command within that folder.

Create the node.js app to read data from the sensor and then use the ‘twitter’ api to create a tweet with the data. The application is really simple but shows off the power of Node.JS and the large ecosystem of libraries available for it.

One good thing about the Tessel2 is that because it is such a lightweight platform you really cannot run fulll sized Node.JS apps on it. As a comparison, a single Node.JS instance can use up to 1.8GB of RAM on a 64-bit machine where as Tessel2 has only 64MB RAM in total for everything that is running on it!

Most common type of applications that you will find yourself writing, in the IoT space, will involve reading some value from a sensor or attached device then either exposing it via a REST server running on Tessel2 itself (pull) or by calling a remote server to write the data (push).

In other words you will just end up writing pipelines to run on Tessel2 which read from a source and write to a destination. You can also provide support for cross cutting concerns such as logging, authentication and remote access.

If you want to Tweet the data then you will need to register a Twitter account and create a ‘Twitter app’ from your account settings. All the keys and secrets are then generated for you. The Twitter API for Node.JS is really easy to use as well. All the info is here.

The implementation can be found here: https://twitter.com/machwe_bot

Few Pointers

Don’t put any complex calculations, data processing or analytics functionality in the pipeline if possible. The idea is also that IoT devices should be deploy and forget.

Be careful of the libraries you use. Certain objects such as ‘clients’ and ‘responses’ can be quite large considering the fact that you only have less than 64MB of RAM to play around with. So you might want to run the program locally and profile the memory use just to be sure.

‘t2 run’ command allows you to test your program on the tessel2 while getting console output to your terminal. This is an excellent way of testing your programs. Once you are ready to ‘deploy and forget’ your Tessel2 just use the ‘t2 push’ command to load your Node.JS app on the device. Thereafter every time the device restarts it will launch your app.

Code

This is the code for the ‘Climate Tweeter’:

‘npm install’ will get you all the imports.

[codesyntax lang=”javascript”]

var Twitter = require('twitter');

var tessel = require('tessel');
var climatelib = require('climate-si7020');

// Init Climate Module
var climate = climatelib.use(tessel.port['B']);

var data = {
  consumer_key: 'your consumer key',
  consumer_secret: 'your consumer secret',
  access_token_key: 'your access token key',
  access_token_secret: 'your access token secret'
};

var client = (new Twitter(data));

setInterval(function(){
    if (climate_status) {
        // Read the Temperature and Humidity
        climate.readTemperature('c', function (err, temp) {
          climate.readHumidity(function (err, humid) {

            // Output Tweet
            var output = (new Date())+',Bristol UK,Home,Temp(C):'+ (temp.toFixed(2)-5) + ', Humidity(%RH):'+ humid.toFixed(2);
            
            //Tweet to Twitter
            client.post('statuses/update', {status : output}, function(error, tweet, response) {
                    if (error) {												
                        console.error("Error: ",error);
                    }                                                                                                                         
            });     
        });
    });
}},600000);

climate.on('ready', function () {
  console.log('Connected to climate module');
  // Climate module on and working - we can start reading data from it
  climate_status = true;
});

[/codesyntax]

What next?

The interesting thing is that I did not need anything external to the Tessel2 to make this work. I did not have to setup any servers etc. I can very easily convert the device to work outdoors as well. I could hook up a camera (via USB) to make this a ‘live’ webcam, attach a GPS and mobile data module with a power pack (for backup) and connect it to your car (via the power port or lighter) – you have a car tracking device.

Enjoy!